
Case study · New facility
String & Can: Designing for Dolby Atmos and Supervised Sessions
Audio post-production · Dolby Atmos Home Entertainment · New York, NY

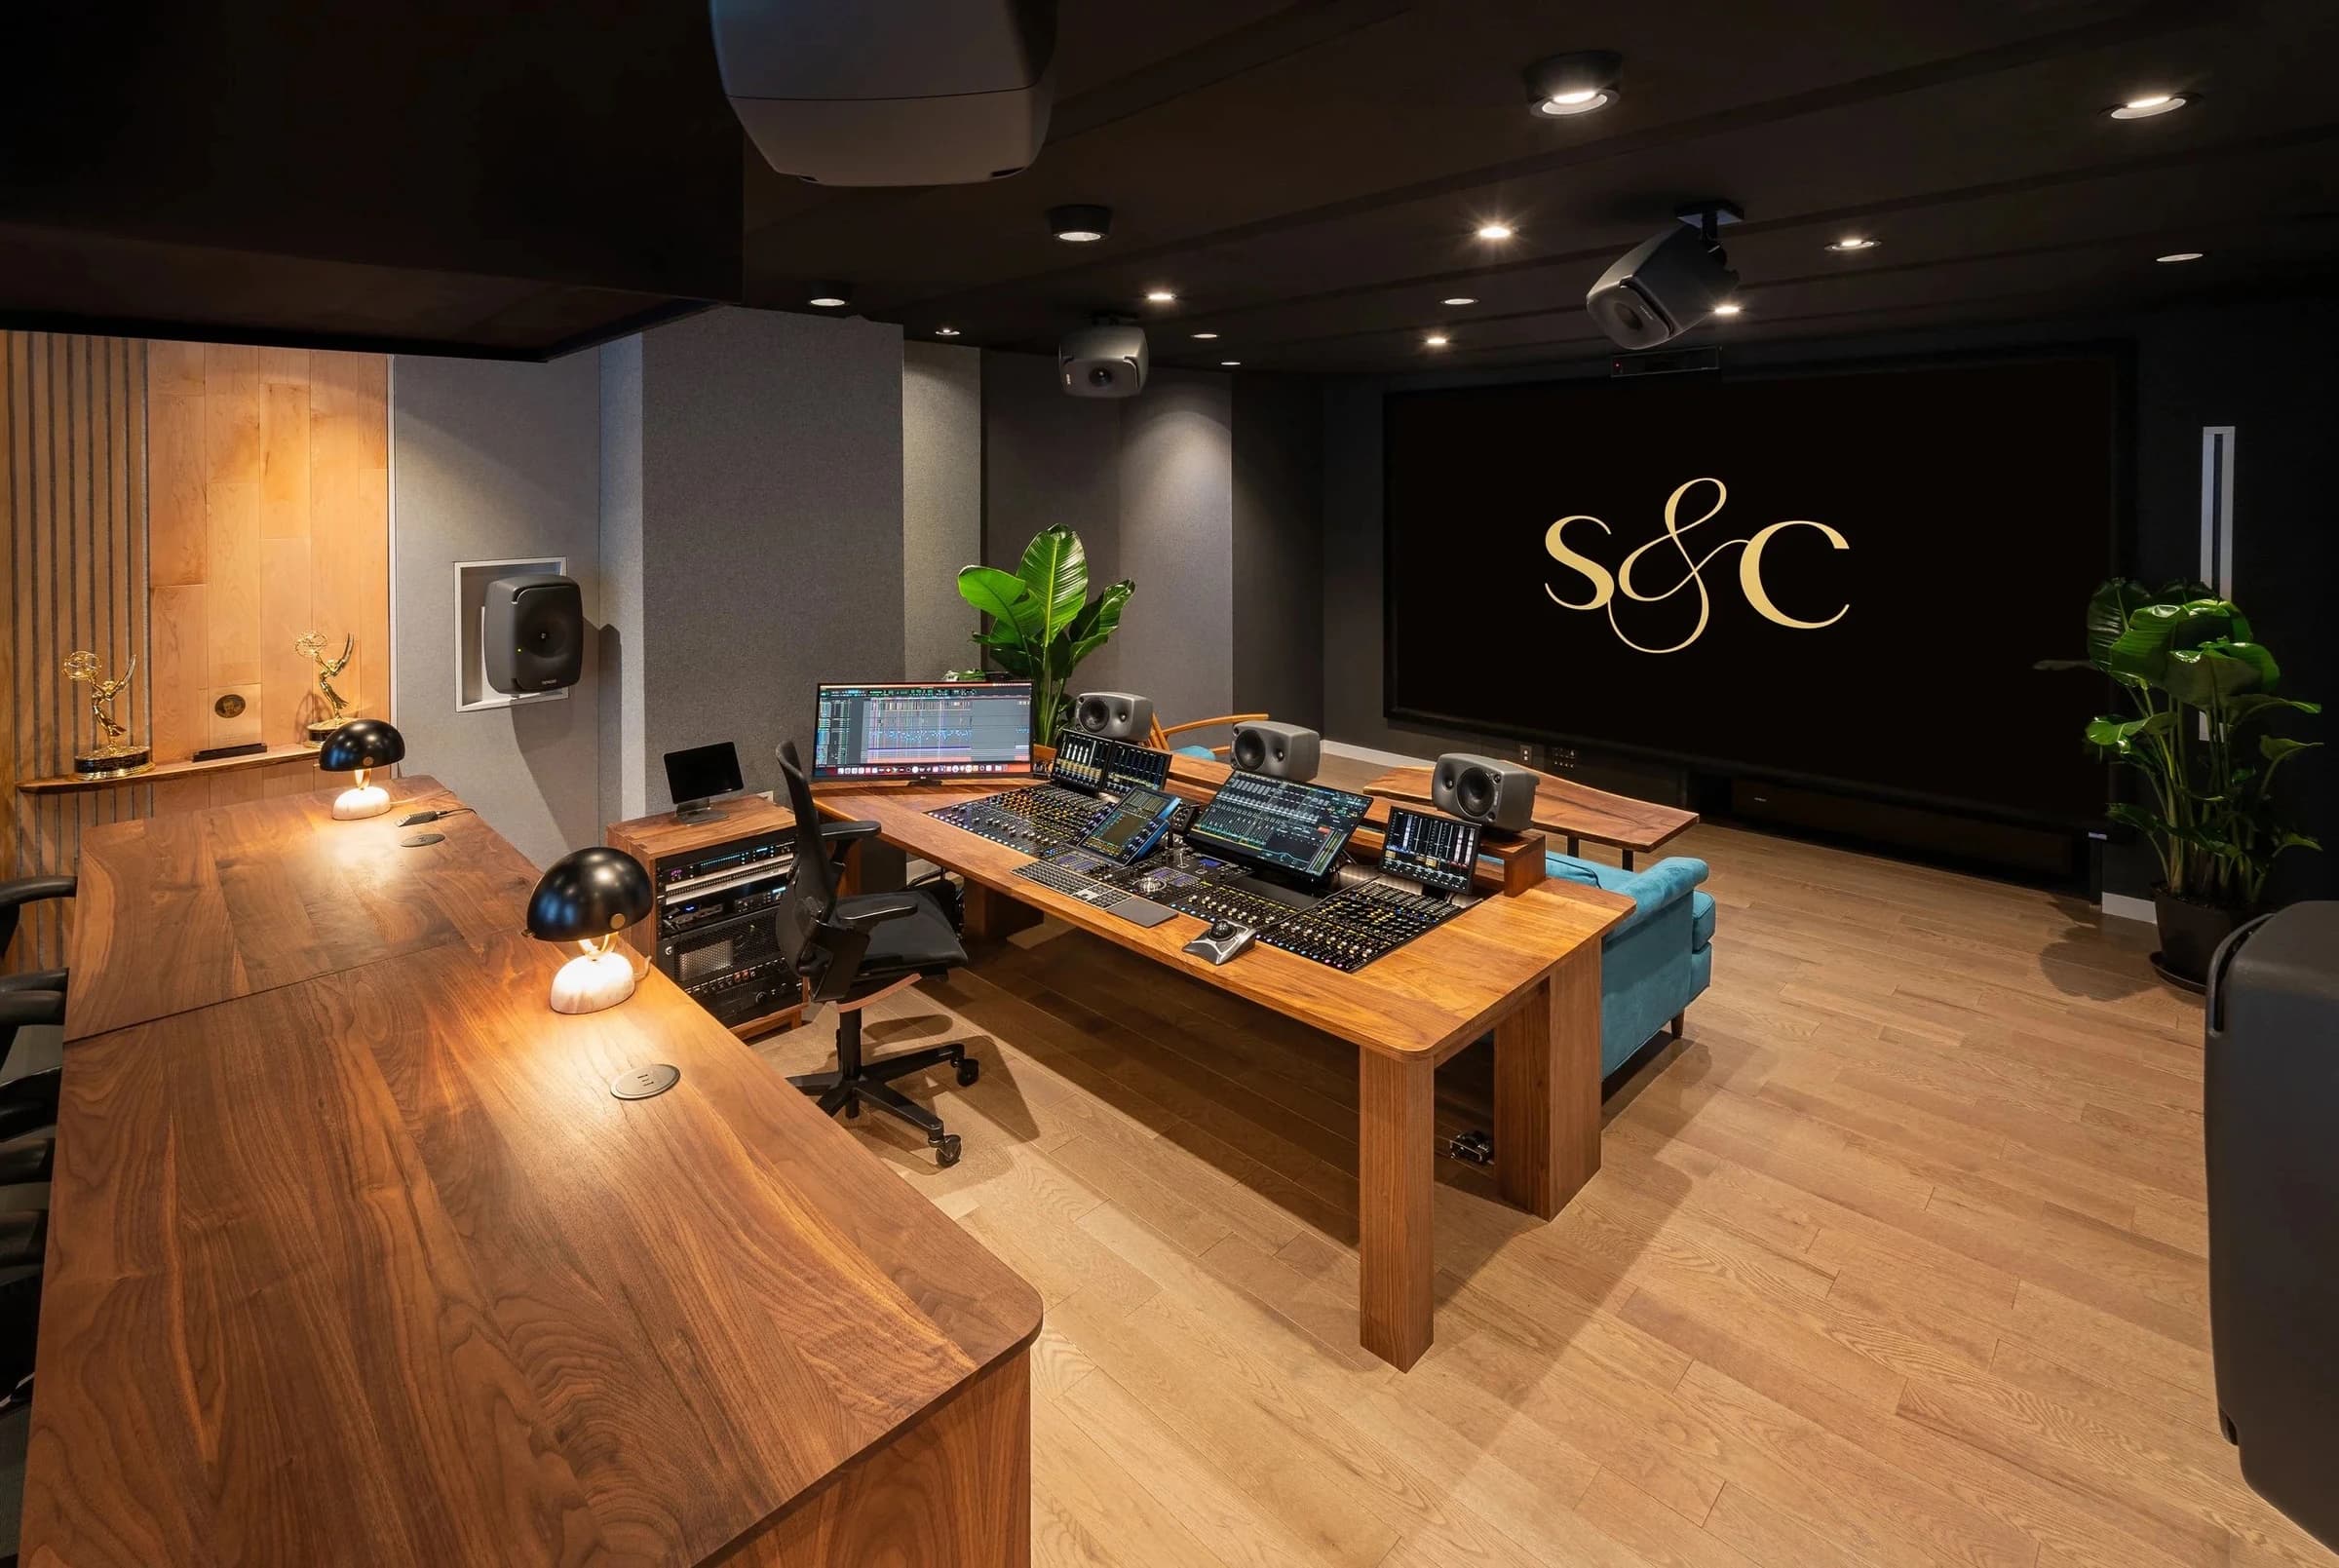
Studio A’s mix position, projection screen and producer seating, with overhead monitoring and wood finishes.
String & Can provides audio post-production for film and television, with published credits including Tires, Somebody Feed Phil and Quiet on Set: The Dark Side of Kids TV. Its 2,000-square-foot Chelsea facility brings immersive mixing, ADR and client-supervised sessions together in the heart of Manhattan.
Originally developed for Great City Post, the facility now serves as String & Can’s Chelsea home. It includes a principal Dolby Atmos mix stage, a second Atmos room connected to an ADR booth, and shared spaces where clients can settle in between sessions.
We designed the facility around two closely connected priorities: accurate monitoring for the engineers and a comfortable experience for everyone attending their sessions. Our scope included facility planning, sound isolation, interior acoustic design and overall interior design, along with coordination of HVAC, electrical and plumbing systems. We also provided project management and construction administration to carry the design through the build.
Studio construction was completed by Alan Miller Acoustics. AV system design, installation and tuning were a collaboration between Full Normal and SŴN Design.
Turning building constraints into a useful room layout
The project began with the possibility of adapting an existing studio. As we investigated the space and its construction, it became clear that achieving the intended performance would require a much more substantial renovation. The resulting design rebuilt the facility around its new program.
The building structure had a direct influence on the studio layouts. We had to position walls where the existing structure could support them and carefully coordinate the distribution and attachment of ceiling isolation hangers. The cinder-ash slab above required particular attention to mechanical fixings and epoxy anchoring methods.
Those constraints made Studio A longer than it otherwise needed to be for Dolby Atmos monitoring. That extra length turned out to be useful.
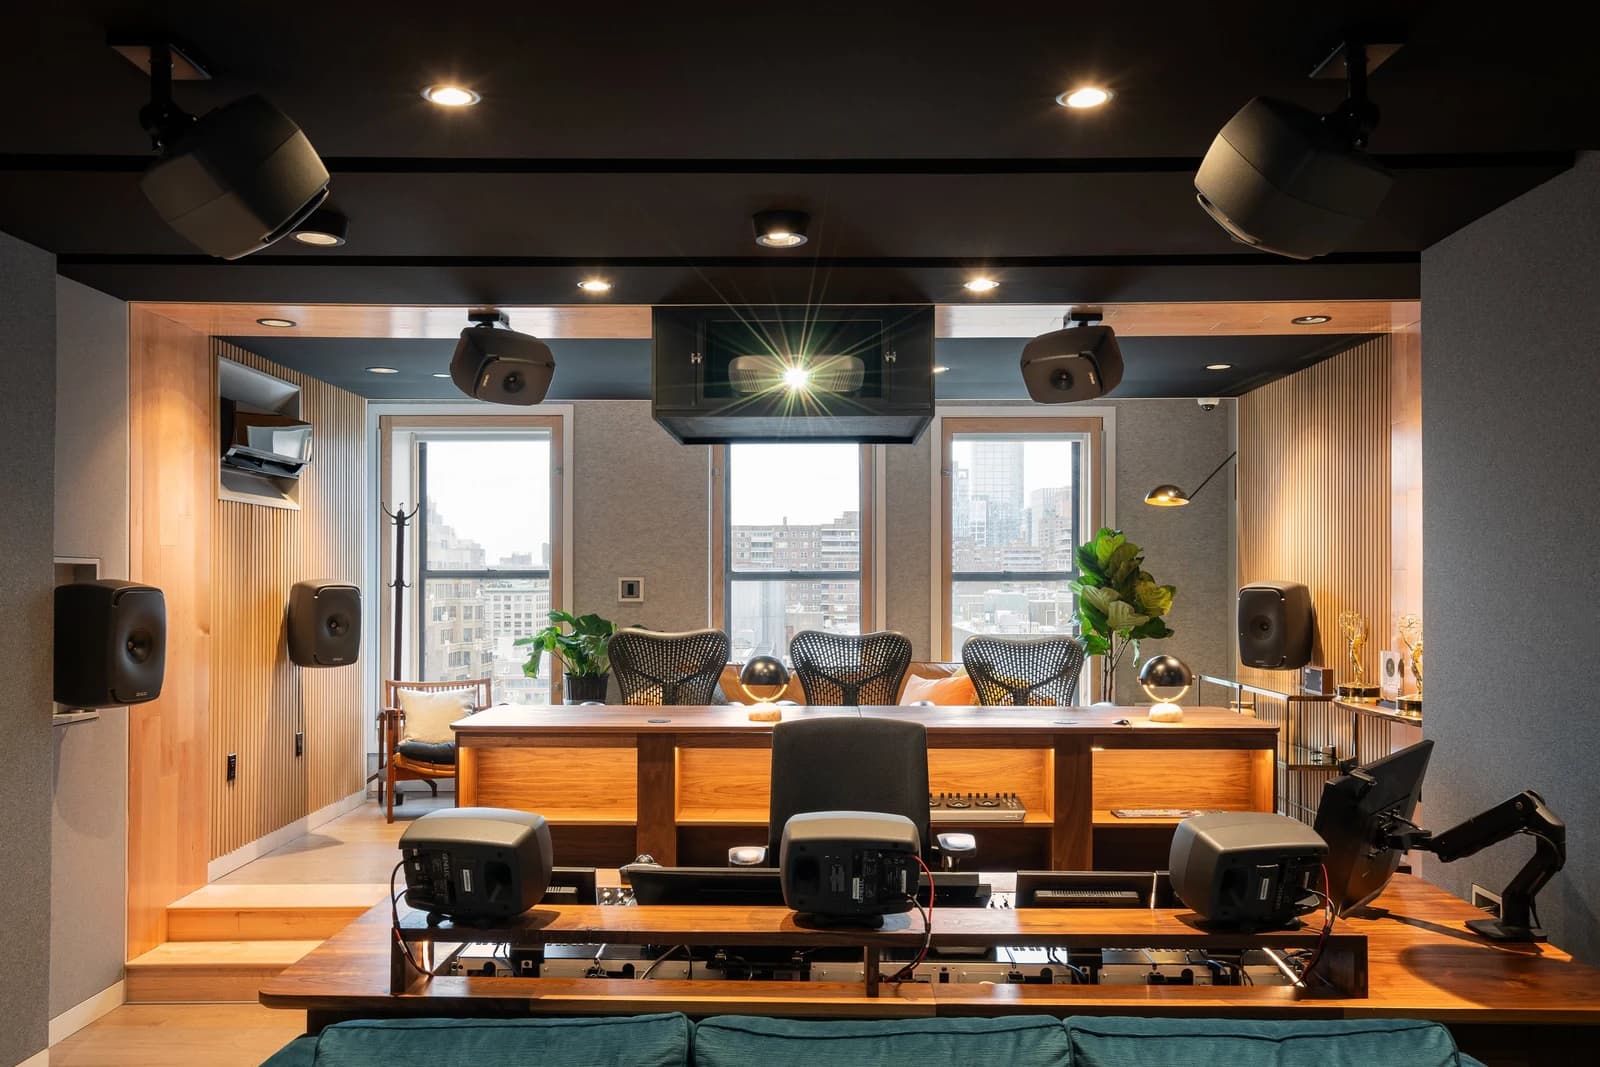
We established a comfortable mix position with client seating toward the front and a separate producer seating area behind the engineer. Tiered seating at the rear gives producers and other attendees a clearer view over the mix position and its computer monitors. The room can accommodate a large supervised session while giving the engineer space to work comfortably.
Planning Studio A around Dolby Atmos requirements
Studio A was designed around a 7.1.4 Dolby Atmos Home Entertainment monitoring layout. We evaluated the room using the Dolby Atmos Room Design Tool, commonly referred to as DARDT, coordinating the room geometry and loudspeaker positions around Dolby’s studio design requirements.
Available ceiling height was an important constraint. The isolated floor and ceiling construction, acoustic treatments and overhead speakers all had to fit within a limited vertical space. Each decision affected the others, so we developed them together rather than treating speaker placement as a final installation step.
The dispersed seating also required careful attention to overhead coverage. The speakers needed to provide a convincing sense of overhead sound for clients throughout the room while preserving the engineer’s ability to judge placement and movement accurately at the mix position.
Picture had to work equally well. The left, center and right speakers and subwoofer sit behind a large perforated projection screen. The projector sits above the producer seating, with its projection path coordinated to clear the computer monitors, the engineer, the overhead speakers and people seated at the front of the room.
We also designed a custom projector isolation enclosure, which was fabricated for the installation. It accommodates heat exchange while containing projector noise, allowing projection to operate within the room’s low-noise environment.
Together, these decisions let engineers and clients follow the same picture and sound without the seating, equipment or projection competing for space.
Moving from visual focus to a welcoming rear seating area
The interior changes gradually as you move through Studio A.
Black fabric surrounds the screen, helping keep attention on the projected image. Moving toward the rear, the fabric transitions through dark, medium and light gray before reaching the maple ring that defines the producer seating area.
Natural textures and wood slats give the rear of the room a warmer, more lively character. This was a deliberate part of the acoustic and interior design: the producer area needed to feel comfortable for conversation without compromising the accuracy of the mix position and front listening areas.
The result is a room with a clear sense of purpose at the screen and a more relaxed atmosphere where clients gather. Both belong within the same working space.
Keeping building noise out of the mix
Studio A sits beside a bank of building elevators and adjacent mechanical equipment. Street noise reaches the three windows at the rear of the room, while the studios themselves need ventilation and cooling. Achieving quiet conditions meant accounting for all of these sources together.
We coordinated the isolated construction with carefully planned service penetrations and duct routes. Duct lengths, bends and internal lining were considered alongside heavy pipe and duct lagging, particularly near penetrations where unwanted sound could enter the rooms.
Energy recovery ventilators provide air exchange, while quiet mini-split units provide cooling within the studios. This approach required close coordination so that fresh air and comfortable temperatures could be maintained without undermining the intended background-noise performance.
Studio A achieved NC-21 with HVAC operating. Studio B achieved NC-19 under the same operating condition.
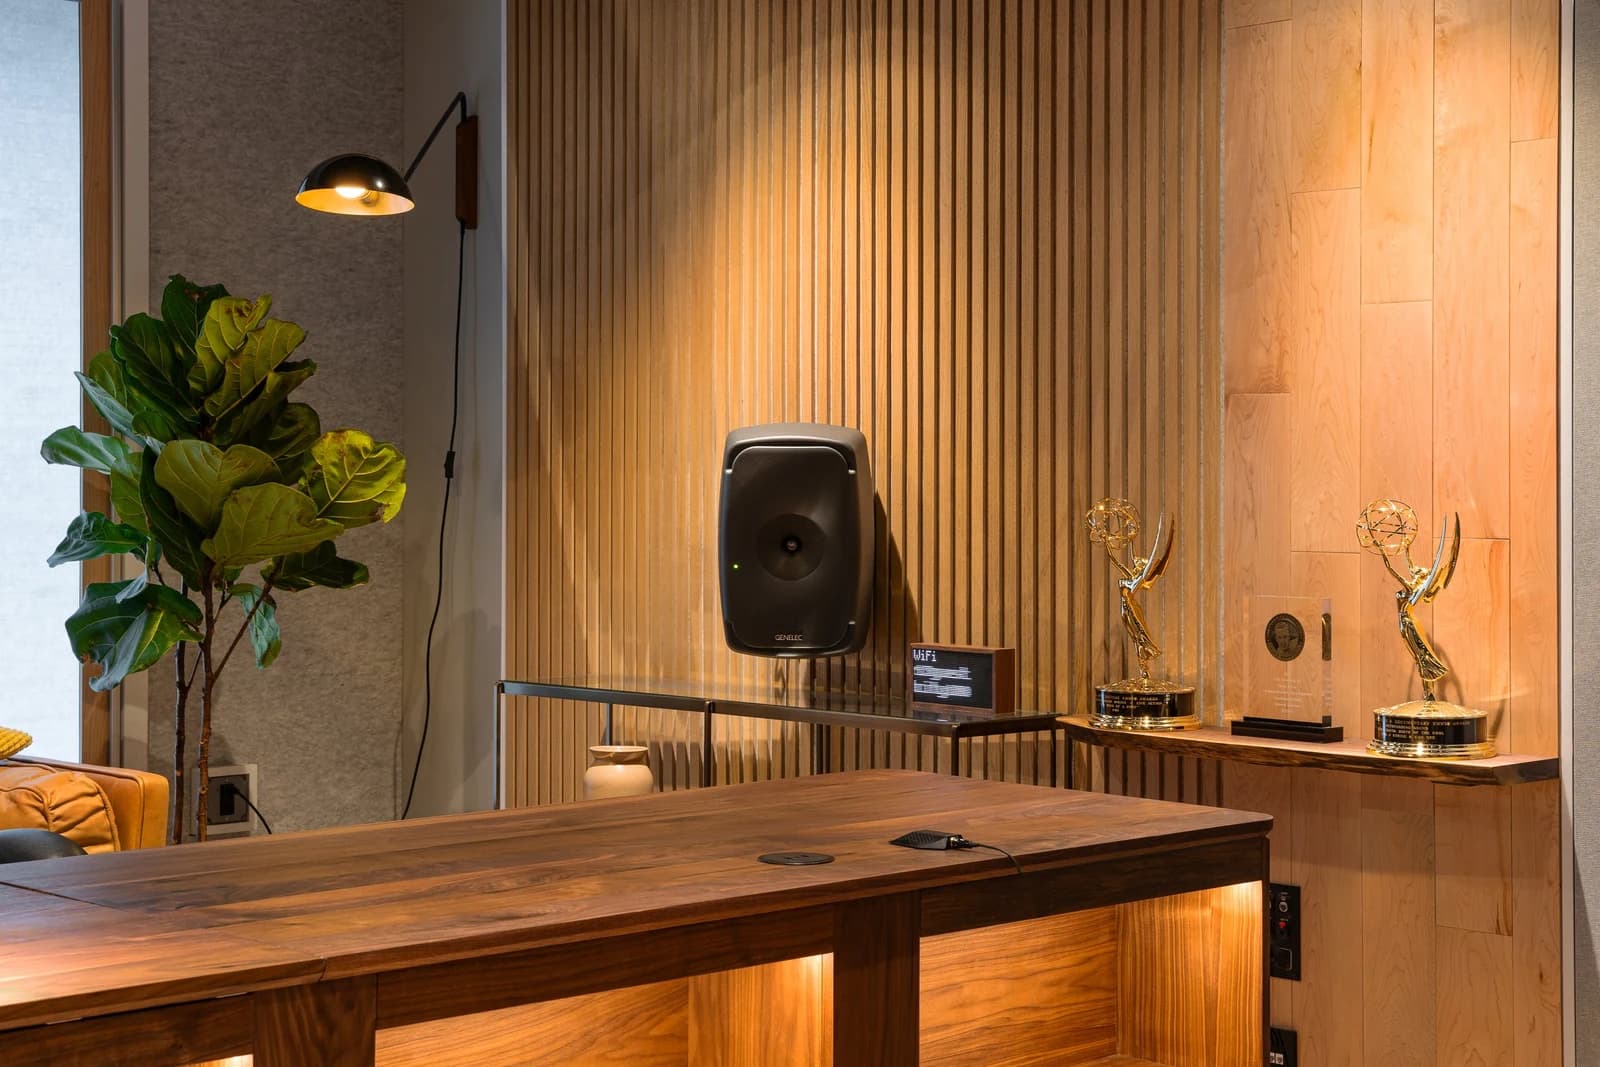
Daylight remained part of the design. Studio A’s three street-facing windows incorporate custom operable secondary windows with 5/8-inch laminated glass and piano hinges. These provide an additional barrier to street noise while retaining daylight and access to the original windows.
The quiet conditions are the product of the whole design: isolation from the surrounding building, careful treatment of service connections, secondary glazing and a cooling and ventilation strategy developed for the rooms.
Connecting a second mix room with ADR
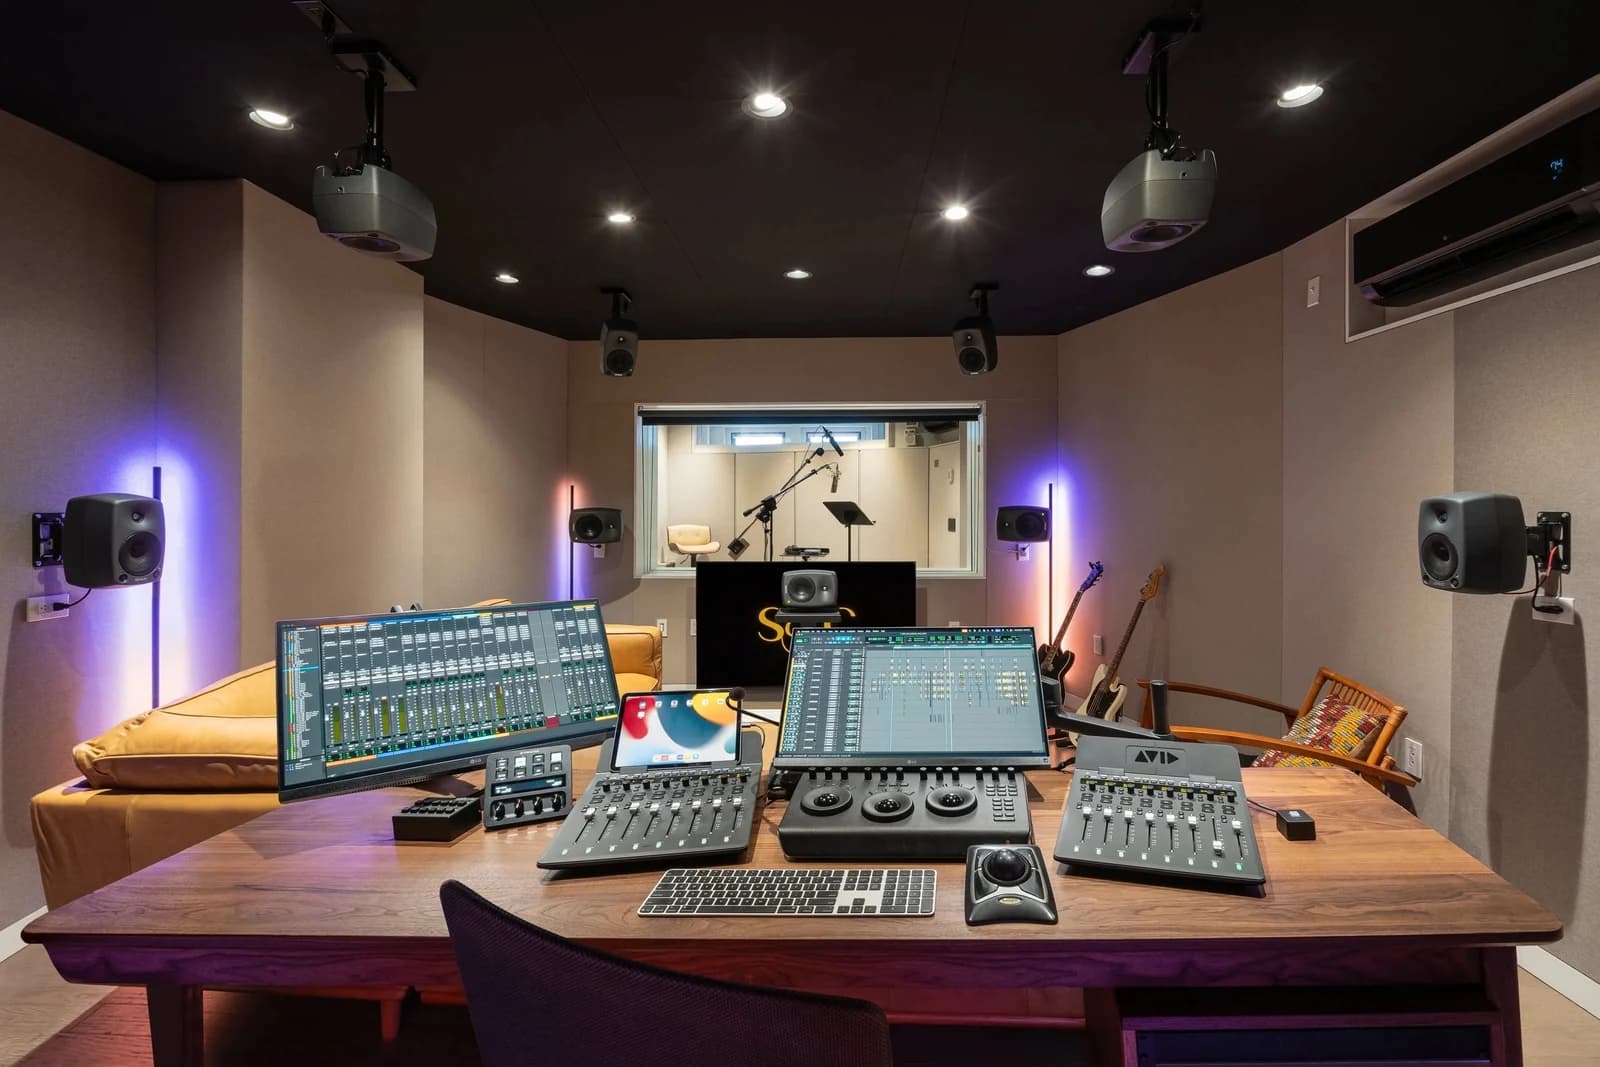
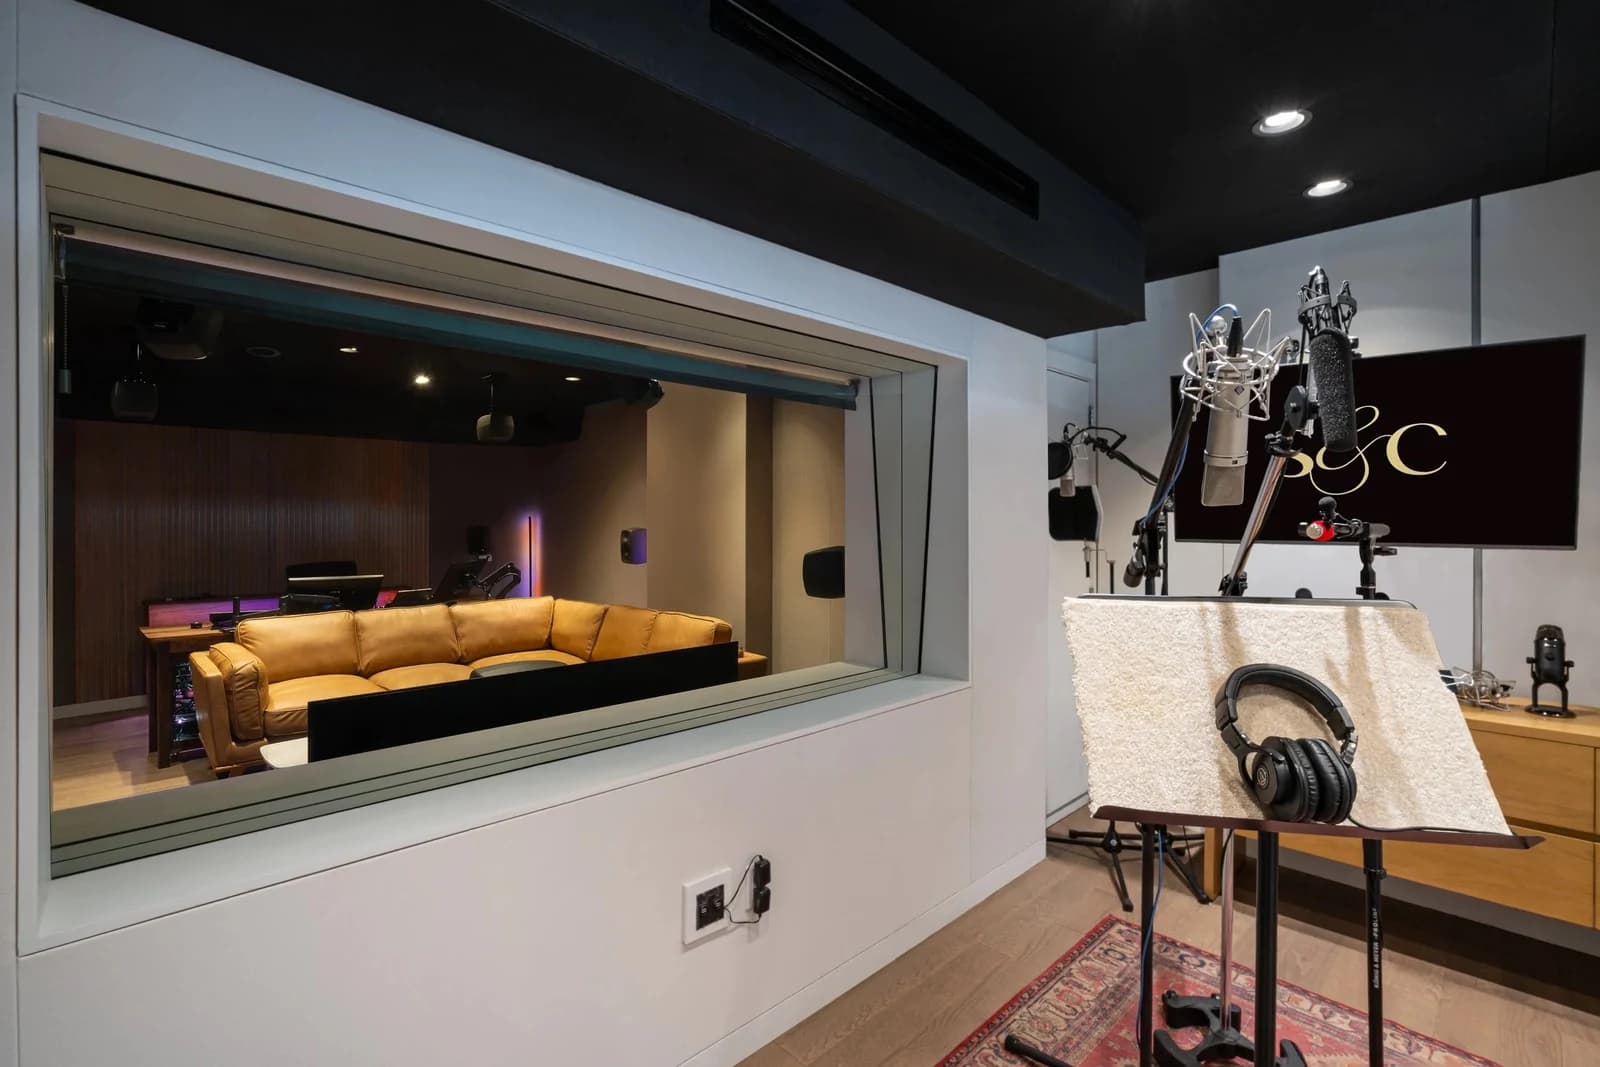
Studio B offers a more compact arrangement, with the engineer at the rear of the room, looking across a generous client seating area toward the front display. A window connects the room visually to the adjacent ADR booth.
The booth was planned to accommodate more than a single voice-over performer, allowing room for larger ADR sessions and the people involved in them. The direct visual connection supports communication between the recording space and the engineer.
Originally configured for surround mixing, Studio B was subsequently upgraded to a 7.1.4 Dolby Atmos system as part of additional work completed in June 2025.
The two mix rooms serve different session needs. Studio A provides the larger stage for immersive mixing and supervised reviews, while Studio B combines a comfortable client listening area with direct access to ADR recording.
Extending the client experience beyond the studios
The client experience continues outside the mix rooms.
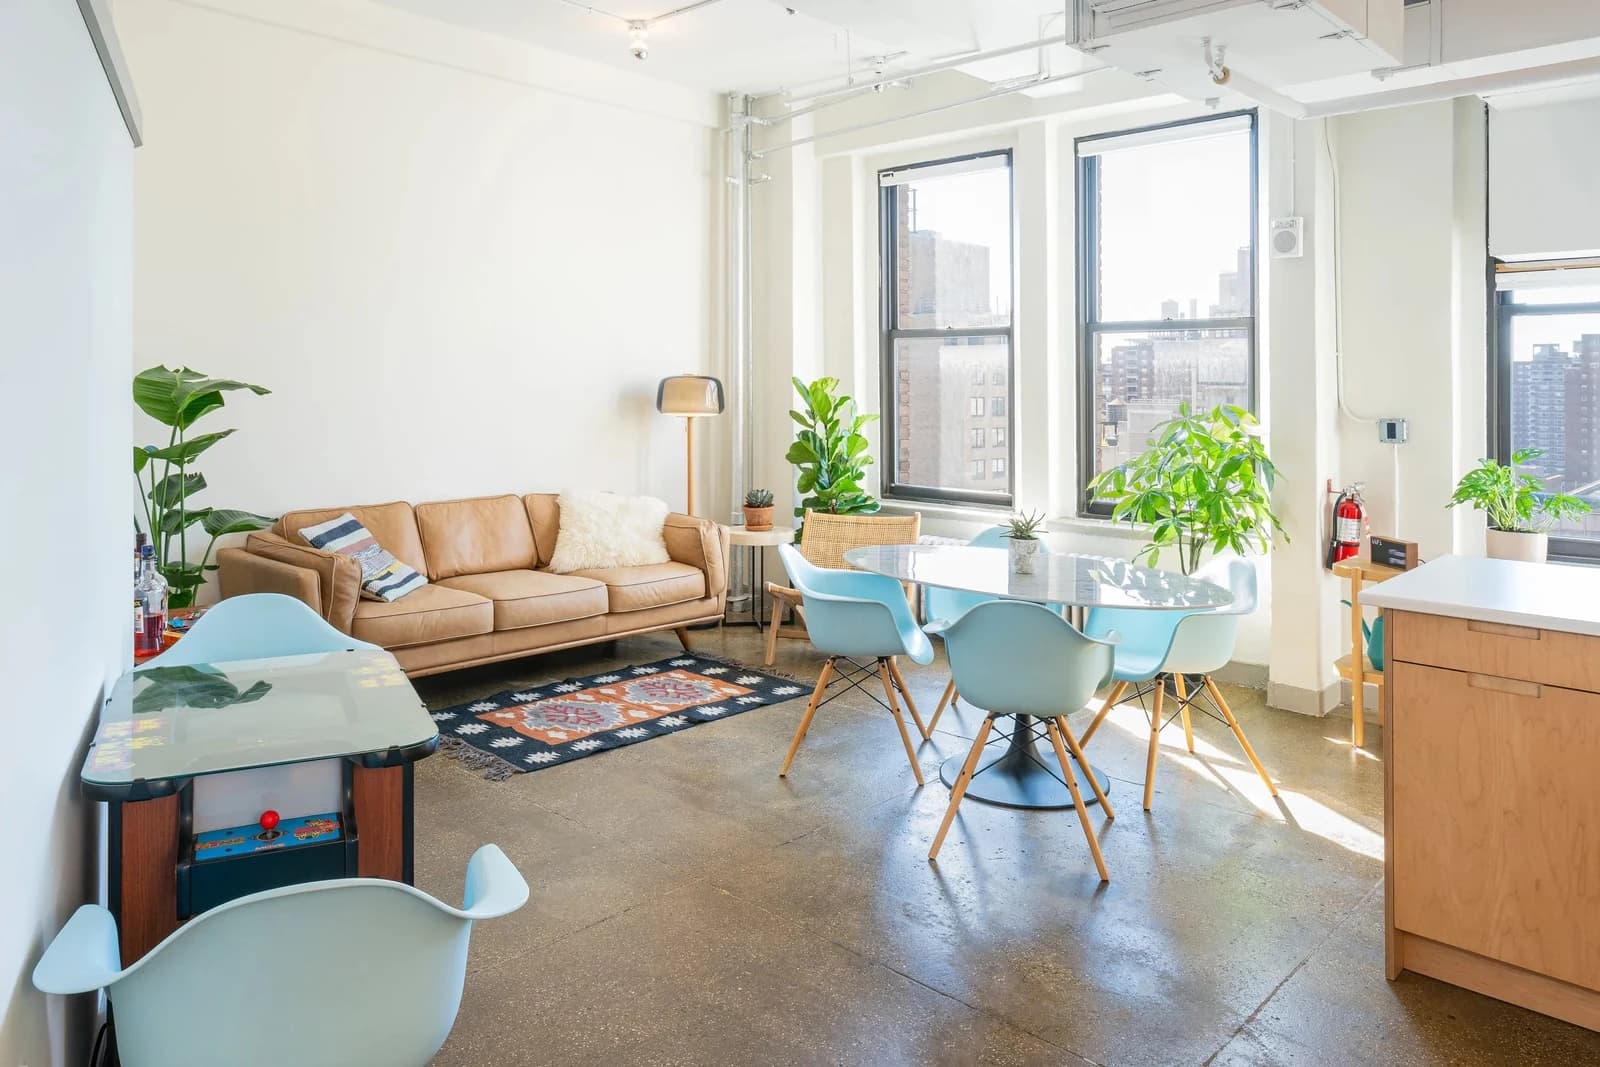
A lounge and kitchen provide a welcoming place to pause between sessions, with daylight helping the shared spaces feel open and relaxed. We designed a curved corridor to connect the facility and allow light to spill farther into the interior from the Seventh Avenue windows.
These spaces give people somewhere to step away from the concentration of a mix session, have a conversation or take a break before returning to the room.
The facility plan also reserves space for a future additional Dolby Atmos stage, leaving room for the operation to grow.
A facility for focused mixing and shared sessions
String & Can’s Chelsea facility supports detailed mix work, ADR recording and the collaborative experience of a final supervised session. Its rooms accommodate resident and visiting engineers, while the seating and shared spaces make room for the producers, filmmakers and clients who participate in the work.
The design brings those needs together: carefully controlled monitoring, quiet operating conditions, clear views of the picture and comfortable places to listen. Within a compact Manhattan footprint, the facility gives both the work and the people behind it room to thrive.
A closer look
Project gallery
Photography: Tom Schaefer
See the full picture before your project takes shape.
Our Studio Self-Assessment gives you an expert-informed look at your project: the strengths in your position, the real complexities involved, and what getting started looks like. It’s built for podcast and audio post teams with a serious studio need. Specific to your situation, and most people finish in under ten minutes.
Take the AssessmentBook a Call
The best way to get started is a direct conversation. In 30 minutes, we’ll learn about your project, answer your questions, and help you understand whether SoniPlan is the right fit for what you’re building. No cost, no commitment. Choose a time below.